This guide aims to tackle the frustrating issue of white dots that occasionally plague Samsung TV screens. By exploring the root causes of these bothersome spots and offering effective solutions, users can elevate their overall television viewing enjoyment. Additionally, valuable insights will be provided on how to minimize the chances of white dots reappearing in the future.
Understanding the source of these white dots is crucial. Often caused by dead pixels or dust particles, they can hinder the visual quality of your TV. Fortunately, this guide will walk you through step-by-step instructions to remove these blemishes using safe and reliable methods, ensuring that your screen remains pristine.
Furthermore, proactive measures will be shared to prevent the recurrence of white dots. By following these recommendations, you can maintain a flawless and immersive viewing experience on your Samsung TV. Say goodbye to those annoying white dots and embrace a more captivating entertainment journey.
Unraveling the Enigma of White Dots on TV Screens
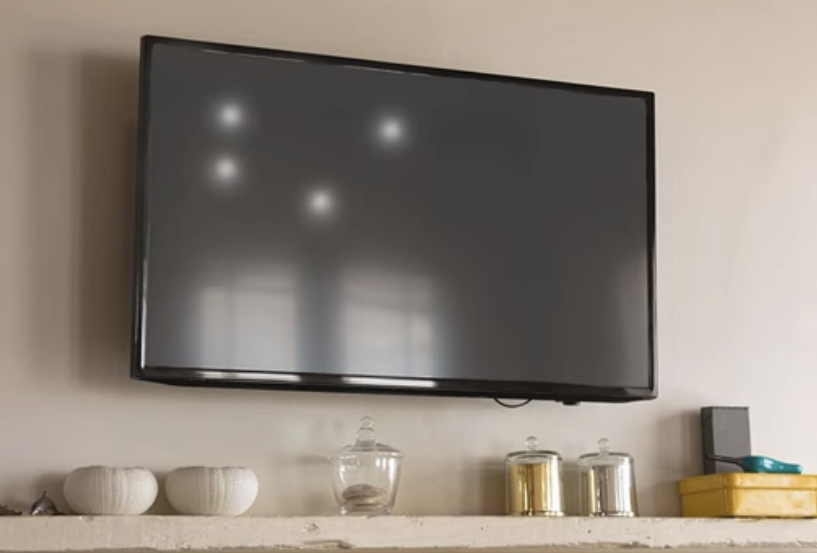
A thorough understanding of the occurrence of white dots on TV screens is crucial. These prominent imperfections are primarily attributed to the detachment of fuser lenses. You can diagnose this problem by carefully tilting the TV and listening for any audible rattling, which suggests that the fuser lenses have become dislodged.
Fuser lenses play a pivotal role in diffusing light produced by LEDs, ensuring uniform illumination. However, their efficacy is compromised when detached, resulting in the emergence of glaring white spots across the screen. Interestingly, these spots become particularly conspicuous when viewing vibrant content, fading into the background as the screen adopts darker shades.
By comprehending the root cause of these disruptive white dots and their connection to fuser lens detachment, you’ll be better equipped to address the issue effectively and restore the visual integrity of your Samsung TV.
A Step-by-Step Process to Rectify White Dots
To rectify the issue of white dots, users must follow these systematic steps:
1. Conduct a Picture Test:
Embarking on the process, start by conducting a picture test on your Samsung TV. This invaluable diagnostic tool serves to illuminate the magnitude of the issue and assists in zeroing in on the root cause. To initiate the test, delve into the TV’s Menu, then navigate to Settings, proceed to Support, and finally, choose the Self Diagnosis feature.
Within the Self Diagnosis menu, you’ll find the Picture Test option. This step is instrumental in gauging the extent of white spots across various color settings. By exploring different color configurations, you can discern how these problematic white dots manifest and whether they vary under distinct circumstances.
Employing the picture test empowers you with crucial insights to make informed decisions about resolving the white dot issue plaguing your Samsung TV. This pivotal step lays the foundation for a more comprehensive and effective troubleshooting journey.
2. Addressing Detached Fuser Lenses:
When identifying detached fuser lenses as the source of the issue, a meticulous procedure is required to reattach them. As a precaution, make sure the TV is unplugged before commencing any work. With caution, remove the back panel to access the dislodged fuser lenses positioned beneath the white sheet.
Taking care during this process is vital. Apply a layer of non-foaming glue to the lenses and then gently reposition them onto the LED. Allow ample time for the adhesive to set, ensuring a secure attachment. This step is pivotal in restoring the proper function of the fuser lenses and eliminating the white spots.
Once the adhesive has fully cured, proceed to reassemble the various components of the TV. Carefully replace the back panel, ensuring a snug fit, and secure any fasteners that were removed. By following these meticulous steps, you can successfully address the issue of detached fuser lenses and bid farewell to those pesky white dots on your Samsung TV screen.
3. Safeguarding the Display Panel:
Continuing the repair process, the next step involves detaching the display panel. Proceed with caution as you delicately disconnect the ribbon cables and gently lift the panel away from the main body of the TV. It’s advisable to mark the orientation of the panel to ensure accurate reassembly later on.
With the display panel removed, your focus shifts to the protective frame that shields the reflector sheet. Carefully remove this frame to access the reflector sheet underneath. The reflector sheet is a crucial component that helps distribute and diffuse the LED-generated light, contributing to the overall visual quality of the screen.
By methodically following these steps, you’re one step closer to resolving the issue of white dots on your Samsung TV. Ensuring precision and attention to detail during each stage of the process will lead to a successful repair, ultimately enhancing your TV-watching experience.
4. Reconnecting Fuser Lenses:
Now that you’ve reached a pivotal juncture in the repair process, gather the detached fuser lenses and prepare to reattach them. With the utmost care, apply a small amount of glue to the backs of the lenses, utilizing a toothpick for precision. Align each lens meticulously with the corresponding LED, ensuring an accurate and snug fit.
- Allow the glue ample time to dry thoroughly, ensuring a strong and durable bond. This step is essential to guarantee the lenses remain securely in place and effectively diffuse light as intended;
- Once the glue has set, begin the reassembly process. Carefully align and place the display panel back onto the TV body, reconnecting the ribbon cables according to your previous markings. Replace the protective frame over the reflector sheet, ensuring proper positioning.
As you proceed, prioritize accurate alignment and attention to detail. Reassemble the various components with care, and double-check the orientation of the display panel to prevent misplacement. With these meticulous steps, you’re well on your way to successfully resolving the issue of white dots on your Samsung TV, ushering in a restored and improved viewing experience.
5. Verification and Aftercare:
With the meticulous reassembly completed, it’s time to take the next crucial step. Reconnect the TV to its power source, power it on, and carefully assess the screen for any remaining white dots. If the problem has been successfully resolved, congratulations on your skillful repair!
- However, should the issue persist or reappear, it’s important to acknowledge that some cases may require professional expertise. In such instances, consider reaching out to a reputable service center that specializes in TV repairs. Trained technicians possess the knowledge and tools to diagnose and address complex issues, ensuring a thorough and lasting solution;
- Prioritizing your viewing experience and the longevity of your Samsung TV, seeking professional assistance when necessary is a prudent course of action. By doing so, you’ll be taking proactive steps to ensure optimal performance and visual quality for your TV in the long run.
Warranty Coverage and Final Considerations
If tackling the repair process yourself feels daunting, rest assured that professional repair services are readily accessible through Samsung-authorized service centers. For added peace of mind, if your TV is still under warranty, you have the opportunity to have it professionally repaired at no expense. Simply present the relevant invoice at your nearest Samsung service center to initiate the warranty claim process.
To facilitate a smooth warranty claim, refer to the official Samsung website for comprehensive instructions. This resource will guide you through the steps needed to ensure you receive the full benefits of your warranty coverage. Additionally, the website will offer a convenient link to help you locate the nearest authorized service center, making the process straightforward and hassle-free.
Whether you choose the DIY approach or opt for professional assistance, Samsung is committed to ensuring your TV-related concerns are addressed effectively, enabling you to enjoy uninterrupted entertainment on your Samsung TV.
Conclusion
Through a comprehensive grasp of the underlying reasons behind white dots on Samsung TV screens and a diligent adherence to this all-encompassing guide, users can confidently address the problem and rejuvenate their viewing experience to its peak brilliance. Whether choosing the path of DIY resolution or enlisting expert aid, the detailed steps laid out herein serve as a reliable blueprint toward achieving a flawless and captivating TV display.
Armed with insights into the causes of white dots and armed with the knowledge of effective remedies, you can embark on the journey to restore your Samsung TV to its optimal state. Whether you’re inclined to roll up your sleeves or prefer professional intervention, this guide equips you with the necessary tools to ensure your TV screen is free from blemishes, allowing you to fully immerse yourself in the captivating world of entertainment.